Product Description
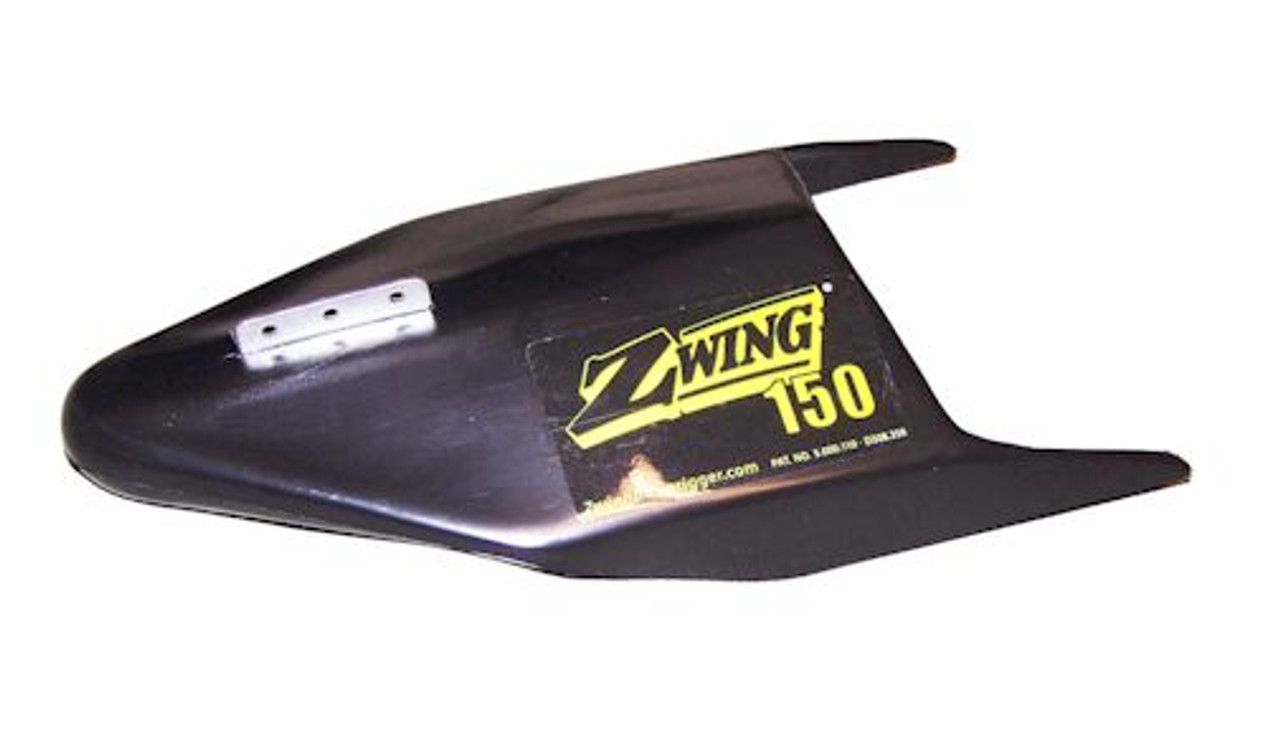
The Z-WING is a lightweight- 13 x 7 piece of virtually indestructible polypropylene plastic. No more heavy lead balls rolling around the boat or swinging off the end of downrigger booms which can cause damage to both angler and boat alike. The Zwing operates on the principle of hydrodynamic depression, rather than just weight. As trolling speeds increase, the Zwing’s hydrodynamic shape increases downward force easily reaching your desired depth. Downward force overcomes drag allowing for constant depth to be maintained at various trolling speeds.
Trolling Depth and Pull Pressure
*All numbers are approximate measures
Zwing 150 (20 foot depth) - Center Hole
| Speed MPH (knots) | Pull Force (lbs) | Angle From Vertical (degrees) |
| 2 (1.73) | 5 | 16 |
| 4 (3.48) | 11 | 19 |
| 6 (5.21) | 25 | 21 |
| 8 (6.95) | 35 | 24 |
| 10 (8.69) | 50 | 27 |
| 12 (10.43) | 70 | 28 |
Zwing 350 (20 foot depth) - Center Hole
| Speed MPH (knots) | Pull Force | Angle From Vertical (degrees) |
| 2 (1.73) | 7 | 15 |
| 4 (3.48) | 14 | 18 |
| 6 (5.21) | 28 | 19 |
| 8 (6.95) | 45 | 22 |
| 10 (8.69) | 60 | 24 |
| 12 (10.43) | 75 | 27 |
Length of Tow Cord Calculation
| Desired Depth (ft) | Angle of Descent (degrees) | Angle From Vertical (degrees) |
| 10 | 16 | 10.3 |
| 10 | 20 | 10.6 |
| 10 | 30 | 11.5 |
| 10 | 40 | 13.1 |
Additional Tips and Information
Be sure to always connect your tow line to the center hole on the Zwing bracket.
The Zwing is a hydrodynamic depressor. Extreme care should be taken when trolling at high speeds to avoid damage to equipment. Increased speed will create increased downward force.
Using the Zwing with a Downrigger
Step 1: Connect your downrigger tow line to the center hole of the Zwing bracket – this is your tow point. The smooth hydrodynamic design puts you in complete control of depth and lateral location of your line.
Step 2: Deploy to desired depth. Add 5’ – 10’ of extra line to compensate for trolling angle and blowback.
Step 3: Connect fishing line to downrigger cord.
Note: The Zwing performance may vary due to tide and current. Be sure to match cable strength with downward force. See Chart Below for downward pull force caused by Zwing.
Using the Zwing With a Bahama Rig
Step 1: Unwind the line from Cuban Yo-Yo until you reach the desired depth you would like for the Zwing to depress to. Add 5’ – 10’ of extra line to compensate for trolling angle and blowback.
Step 2: Once you have the line unraveled to the desired length, tie the line off to a cleat at the stern of the boat.
Step 3: Attach the swivel to the center hole of the Zwing - this is your tow point. The smooth hydrodynamic design puts you in complete control of depth and lateral location of your line.
Step 4: At a slow trolling speed, deploy the Zwing off the stern and feed the line into the water until it becomes tight. Once the line is tight you are ready to drag some bait.
Step 5: Connect fishing line to the downrigger cord.
Note: The Zwing performance may vary due to tide and current. Be sure to match cable strength with downward force. See Chart Below for downward pull force caused by Zwing.
FAQ:
How does the Zwing work?
Operating on the principle of hydrodynamic depression, rather than weight, the Zwing offers boat captains and anglers the ability to troll lures and baits over a range of speeds without complicated adjustments to the tow cord lengths. The design puts you in control of depth and lateral location. Unlike any other weighted planar the Zwing’s unique design creates an underwater vibration similar to that of injured or schooling baitfish. The Zwing is made from, lightweight, virtually indestructible, polypropylene plastic and can be customized to track in any direction away from your boat.
What is the benefit of the Zwing compared to a lead ball?
Operating on the principle of hydrodynamic depression, rather than just weight, the Zwing overcomes the shortcomings of the conventional lead ball. The lead ball rises with speed. The Zwing’s hydrodynamic shape increases downward pressure with speed. No more heavy lead balls rolling around the boat or swinging off the end of downrigger booms which can cause damage to both angler and boat alike.
How do I set up the Zwing?
The setup is easy. Connect your downrigger tow line to the center hole of the Zwing bracket – this is your tow point. Connect your fishing line to the downrigger line. The smooth hydrodynamic design puts you in complete control of depth and lateral location of your line. Downward force overcomes drag allowing for constant depth to be maintained at various trolling speeds.
Note: The Zwing performance may vary due to tide and current. Be sure to match cable strength with downward force.
Can a Zwing be used for purposes other than fishing?
Yes. Customers have ordered Zwing’s for under water photograph and videography purposes. Customers have also purchased the Zwing for marine biology tests such as towing nets to collect debris at different depths, collecting temperature and pH levels… etc.
What type of fishing is the Zwing used for?
The Zwing can be used for all type of fishing, fresh and salt water. Almost, any type of trolling purpose where the fisherman needs to get the bait or lure to a desired depth.
How to deploy the Zwing?
First, let out your trolling line until the lure is 30ft or so behind the boat…
Attach the trolling line to the quick-release clip above the Zwing…
Slowly let out the downrigger line to reach the desired depth allowing it to draw out your trolling line as it goes (The Zwing will depress at approximately a 20 degree angle below your boat, if you want to reach 20ft depth let out approximately 25′ of line)…
Set the drag on your reel… Now just sit back and wait…
How deep can a Zwing go?
We have found that the Zwing can comfortably depress to a 100′ depth.
Yellow or Black?
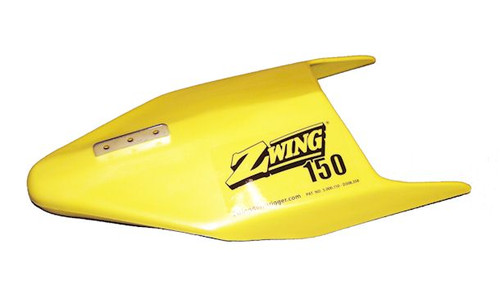
The Zwing color is preference. Some captains swear by the Yellow wing while others prefer the Black.
What is the difference between the 150 & 350?
The Zwing 150 – The lighter 1.5 lb. wing. Performs best at faster speeds (5 knots and above) The Zwing 350 – The heavier 3.5 lb. wing. Performs at all speeds, and will perform better at slower speeds.
Does the Zwing come with a quick release?
No, the Zwing does not come with a quick-release.
What test (strength) line should I use?
We recommend using as least 200lb test. Besides depth, and tow position, the diameter of the tow cord can impact efficiency of the Zwing. Thicker diameter tow cords create more drag which must be overcome by downward force. Thinner diameter tow cords create much less tow cord drag and allow for more efficient performance and steeper angles of decent, especially at slower speeds. Keep in mind, the Zwing does create downward pressure at fast speeds. Be sure your downrigger can support this pressure.
What hole on the bracket do I attach the downrigger cord too?
There are three holes in the Zwing. The downrigger cord should be connected to the center hole in the bracket. The back hole would be for attaching a release clip. The front hole is used for the manufacturing process, the downrigger line can be attached to this hole, but it is not recommended.
