
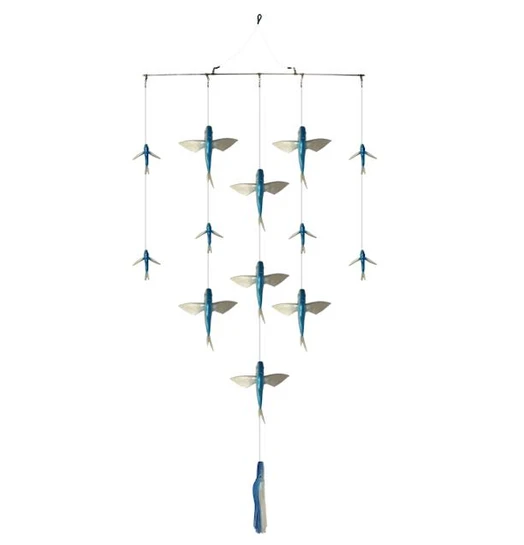
Tuna Trolling with Spreader Bars: The Complete Guide to Rigging, Trolling, and Catching More Tuna
OFFSHORE FISHING GUIDE • TUNA TROLLING • SPREADER BAR TECHNIQUES

Trolling spreader bars is one of the most effective techniques for targeting tuna in offshore waters. Whether you're chasing yellowfin tuna, bluefin tuna, bigeye tuna, or longfin albacore, a properly rigged spreader bar can turn a slow day of fishing into an unforgettable offshore adventure.
Spreader bars are designed to imitate a school of baitfish or squid fleeing across the ocean's surface. By creating the appearance of multiple prey animals moving together, they attract tuna from a distance and encourage aggressive feeding responses.
Unlike traditional single-lure trolling methods, spreader bars present an entire school of artificial bait, often with a single hooked lure trailing behind the teasers. This combination of visual attraction, surface commotion, and a strategically positioned hook bait makes spreader bars extremely productive when tuna are feeding near the surface.
However, successful spreader bar fishing involves more than simply putting a bar in the water and trolling offshore. Understanding bar construction, lure size, color selection, trolling speed, spread positioning, and rigging techniques can dramatically improve your results.
In this comprehensive guide, we'll explain how tuna spreader bars work, how to choose the right setup, and how to build an effective trolling spread that consistently attracts and hooks tuna.
1. What Is a Tuna Spreader Bar?
A tuna spreader bar is a trolling device designed to present multiple artificial baits simultaneously, creating the appearance of a small school of squid, baitfish, or other prey moving across the surface.
Most spreader bars feature a horizontal stainless steel or titanium bar with multiple artificial squid or fish-shaped teasers attached to dropper lines.
The bar spreads the teasers across a wide area, producing a larger visual target than a conventional trolling lure.
A typical spreader bar includes:
-
Spreader bar frame: A rigid or flexible metal bar that holds the teaser lines apart.
-
Artificial squid or baitfish: Soft plastic or other artificial teasers designed to imitate natural prey.
-
Dropper lines: Short lengths of line connecting the teasers to the spreader bar.
-
Hooked stinger bait: A trailing artificial bait equipped with a fishing hook.
-
Main leader: Connects the spreader bar assembly to the fishing line.
-
Swivels and terminal connections: Allow secure attachment and help manage twisting and movement.
The teasers are normally hookless, while the trailing stinger bait contains the hook that catches the fish.
Click Here to See Our Spreader Bar Selection

Tuna are highly visual predators that frequently feed on schools of baitfish and squid.
A spreader bar creates the illusion of a concentrated group of prey, making it an attractive target for hunting tuna.
Several features contribute to its effectiveness.
Schooling appearance: Multiple artificial baits moving together imitate a natural prey school.
Surface commotion: The teasers splash, skip, and disturb the surface, making the spreader bar more noticeable.
Visual profile: A spreader bar presents a much larger target than a single trolling lure.
Predator response: Tuna may attack the trailing bait, which appears to be a vulnerable member of the school.
Coverage: Spreader bars allow anglers to create a broad, highly visible trolling spread without using a large number of separate fishing rods.
The goal is to convince tuna that they have discovered a vulnerable school of prey worth attacking.
Click Here to See Our Spreader Bar Selection
2. Choosing the Right Spreader Bar for Tuna Fishing
Not all spreader bars are created equal. Bar size, construction, teaser configuration, and bait size all influence how effectively the rig performs.
Common spreader bar sizes
Spreader bars are often categorized by their overall width or the size of the squid used on the rig.
|
Spreader bar width |
Typical application |
|---|---|
|
18–24 inches |
Compact spreads, smaller boats, lighter tackle |
|
30–36 inches |
General-purpose tuna trolling |
|
36–48 inches |
Larger offshore spreads and bigger teaser presentations |
|
48+ inches |
Specialized large presentations, often requiring outriggers or other suitable support |
These are approximate categories. Actual product dimensions and teaser configurations vary by manufacturer.
For many offshore anglers, a 30- to 36-inch spreader bar provides a useful balance of visibility, manageable drag, and ease of deployment.
Stainless steel vs. titanium spreader bars
Two common materials used in spreader bar construction are stainless steel and titanium.
Stainless steel spreader bars are durable, relatively affordable, and widely available. Their rigidity helps maintain consistent teaser spacing.
Titanium spreader bars are generally lighter and more flexible. Their spring-like properties can allow the teasers to move more naturally in certain conditions.
Neither material is automatically superior. Quality construction, balanced rigging, and proper trolling performance matter more than material alone.
How many squid should a spreader bar have?
Spreader bars are available with a variety of teaser arrangements, including 7, 9, 11, 13, and more squid.
Larger teaser arrays create a more substantial bait-school profile, but they also increase drag and can be more difficult to handle.
For general tuna trolling, a 9- or 11-squid spreader bar is an excellent starting point.
Click Here to See Our Spreader Bar Selection
3. Choosing the Best Spreader Bar Squid Size

Artificial squid size should be selected based on the target tuna, local forage, sea conditions, and desired trolling presentation.
Common squid sizes include 4.5, 6, 9, and 12 inches.
|
Squid size |
Suggested application |
|---|---|
|
4–5 inches |
Smaller bait profiles, school-size tuna, finicky fish |
|
6 inches |
Versatile all-around yellowfin and bluefin trolling |
|
8–9 inches |
Larger tuna and more substantial bait-school presentations |
|
12 inches |
Oversized presentations for large tuna and specialized conditions |
Smaller squid presentations
Smaller squid can be particularly effective when tuna are feeding on small baitfish, juvenile squid, or other compact forage.
They also generate less drag, making them easier to troll on lighter tackle.
Larger squid presentations
Larger squid create a more noticeable profile and can be effective when tuna are feeding aggressively on larger prey.
However, bigger is not always better.
If tuna are feeding on small sand eels, anchovies, or other small baitfish, an oversized squid bar may not match the available forage.
Pro tip: Carry spreader bars with at least two different squid sizes. This allows you to adjust the presentation when tuna become selective.
Click Here to See Our Spreader Bar Selection
4. Best Spreader Bar Colors for Tuna
Color selection is one of the most frequently debated subjects in tuna fishing.
While no single color works in every situation, several combinations have established themselves as popular offshore choices.

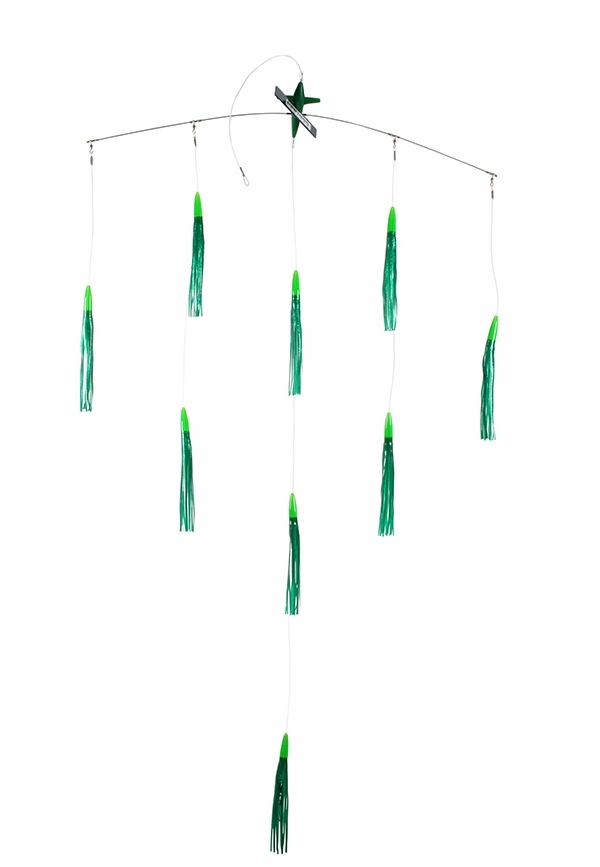
Green / Green Machine
Green squid bars are a popular all-around choice for yellowfin and bluefin tuna. They provide a recognizable profile in a variety of offshore conditions.

Pink
Pink spreader bars provide a bright, contrasting presentation and are frequently used when tuna are actively feeding near the surface.

Purple / Black
Darker combinations produce a strong silhouette against brighter surface water. They are popular for tuna trolling in varied light conditions.
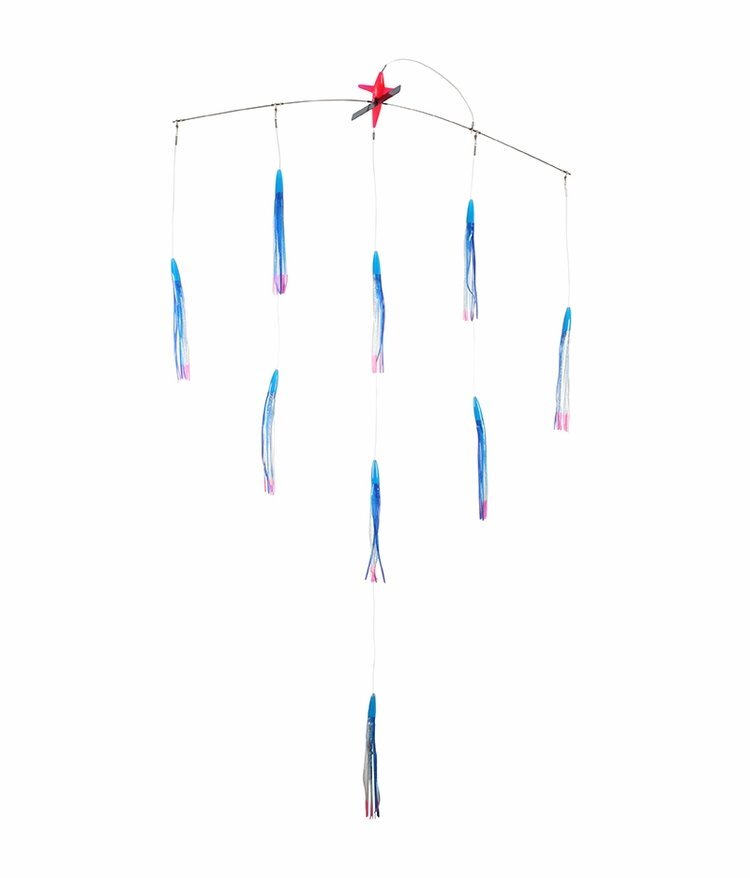
White and pearl squid imitate pale bait and can be effective in clear water, particularly when tuna are feeding on squid or light-colored forage.
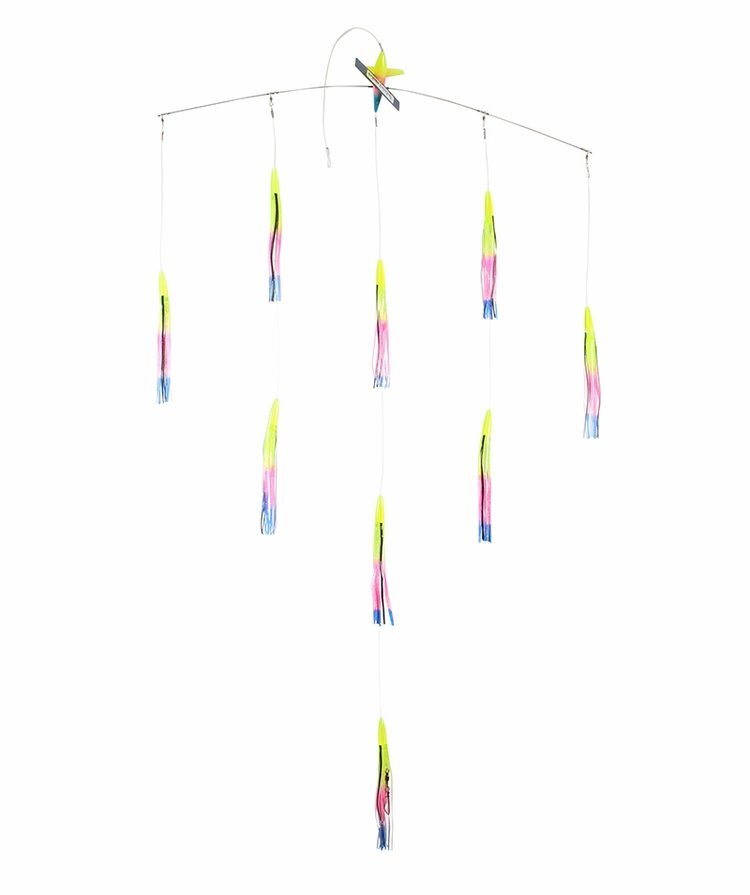
Rainbow / Multi-Color
Multi-color bars provide varied contrast and can be useful when experimenting with presentations or fishing changing light conditions.
Does spreader bar color really matter?
Color can influence the appearance of a lure, but it is only one part of the presentation.
Teaser size, movement, surface disturbance, trolling position, and proximity to feeding tuna are often more important than subtle color differences.
Rather than running every spreader bar in the same color, try a combination of natural and high-contrast patterns.
This gives tuna different visual presentations and helps identify what is producing strikes.
Click Here to See Our Spreader Bar Selection
5. How to Rig a Tuna Spreader Bar
Correct rigging is essential for both performance and reliability.
A poorly rigged spreader bar may twist, tangle, run incorrectly, or fail when a large tuna strikes.
Understanding the stinger bait
The stinger is the hooked lure that trails behind the teaser school.
Its placement is one of the most important aspects of the entire spreader bar system.
The stinger should appear to be a vulnerable squid or baitfish separated slightly from the main group.
A common starting point is to position the stinger approximately 12–36 inches behind the rearmost teasers, although the ideal distance depends on the bar design and trolling conditions.
If the stinger is too close to the teaser array, it may become tangled or difficult for a fish to isolate.
If it is too far behind the bar, it may lose the visual association with the school.
Choosing the correct stinger hook
Most conventional tuna spreader bars use a strong single hook in the trailing stinger bait.
The hook must be appropriately sized for the stinger lure and target species.
Important considerations include hook gap, strength, point sharpness, and the ability to maintain secure penetration during a long fight.
For many medium-sized tuna spreader bar stingers, heavy-duty hooks in the approximate 7/0–10/0 range are common starting points. Larger baits and heavier tackle may call for different sizes.
Actual hook dimensions vary significantly between manufacturers.
Selecting leader material
Monofilament and fluorocarbon are both used in tuna trolling systems.
Heavy monofilament offers abrasion resistance, flexibility, and some shock absorption.
Fluorocarbon is valued for its abrasion resistance and optical properties, although it can be stiffer and more expensive.
Leader strength should be matched to the target tuna, tackle, drag settings, and rig construction.
For many offshore tuna trolling applications, leaders in the 100–200-pound class are used, while large bluefin and heavy-tackle systems may require substantially stronger components.
Always follow the spreader bar manufacturer's recommended rigging specifications.
Checking your connections
Before deployment, inspect all swivels, crimps, knots, hooks, and attachment points.
A spreader bar has multiple components exposed to vibration, water pressure, and repeated impacts.
Even a small weakness can result in losing a fish or an expensive rig.
Click Here to See Our Spreader Bar Selection
6. Best Trolling Speeds for Tuna Spreader Bars
Trolling speed has a major influence on how spreader bars perform.
The goal is to make the artificial squid skip and splash naturally while keeping the bar stable and the stinger in the correct position.
GENERAL STARTING SPEED
5–7 knots
for conventional squid spreader bars
This is a useful initial range, not a universal optimum. Some bars perform better outside it depending on their design, sea conditions, and position behind the boat.
Trolling speed by tuna species
|
Tuna species |
Suggested starting range |
|---|---|
|
Yellowfin tuna |
5–7 knots |
|
Bluefin tuna |
4.5–6.5 knots |
|
Bigeye tuna |
5–7 knots |
|
Albacore tuna |
5.5–7.5 knots |
These ranges overlap substantially. The most important factor is how the particular spreader bar behaves in the water.
How to know if your speed is correct
A properly performing spreader bar should produce consistent surface commotion without excessive bouncing or tumbling.
Look for the squid to skip, splash, and move together in a convincing school-like pattern.
If the bar repeatedly flips, submarines, or becomes unstable, adjust speed or positioning.
Remember that sea conditions, currents, and boat direction affect the actual speed of the lure through the water. GPS speed over ground is not always the same as water-relative speed.
Click Here to See Our Spreader Bar Selection
7. Where to Position Spreader Bars in Your Trolling Spread
Spreader bars are particularly effective when deployed from outriggers because the wider line angle helps separate them from the boat's wake and other trolling lines.
However, they can also be fished from suitable rod holders, depending on the boat's layout and the size of the bar.

Long outrigger positions
Long outrigger positions are popular for spreader bars because they provide separation from the boat and allow the teasers to operate in relatively undisturbed water.
They can be especially useful when trolling multiple spreader bars.
Short outrigger positions
Short outrigger positions can also produce excellent results.
Some tuna respond aggressively to the commotion created near the boat's wake, making these positions productive in certain conditions.
Flat-line positions
Smaller, lighter spreader bars may be trolled from flat-line positions when adequate separation and clearance are maintained.
However, large spreader bars can generate substantial drag and may be difficult to manage without an outrigger or other appropriate support.
Center or shotgun positions
A spreader bar can sometimes be run farther behind the boat in a center position, provided it remains separated from other lines.
This can be effective when tuna are reluctant to approach the boat.
The most important consideration is maintaining a clean spread where every lure swims properly and can be cleared efficiently during a hookup.
Click Here to See Our Spreader Bar Selection
8. Building an Effective Tuna Trolling Spread
One of the biggest advantages of spreader bars is their ability to work alongside traditional tuna trolling lures.
A well-designed spread combines different presentations to attract fish under a variety of conditions.
Example: Six-Line Tuna Trolling Spread
Illustrative layout — stern at bottom, trolling direction toward top
Spreader bars (4)
Single lures (2)
A practical six-line spread might include two larger spreader bars in the long outrigger positions, two smaller bars in the short outrigger positions, and two single tuna lures on the flat lines.
This provides a combination of large bait-school presentations and individual fleeing prey.
Another effective approach is to run two spreader bars with several traditional tuna feathers, cedar plugs, or skirted trolling lures.
The best spread is one that your crew can manage safely and efficiently.
Click Here to See Our Spreader Bar Selection
9. Spreader Bars vs. Daisy Chains: What's the Difference?
Spreader bars and daisy chains are both designed to imitate multiple baitfish or squid, but they create different presentations.
Spreader bar
Creates a wide, school-like formation with multiple rows or columns of teasers.

Daisy chain
Presents several teasers in a relatively narrow line, often ending with a hooked lure.
|
Feature |
Spreader bar |
Daisy chain |
|---|---|---|
|
Presentation |
Wide bait school |
Narrow trailing group |
|
Surface disturbance |
Often greater |
Usually more concentrated |
|
Drag |
Generally higher |
Generally lower |
|
Deployment |
Often best with outriggers |
More versatile |
|
Storage |
Bulkier |
More compact |
|
Best use |
Creating a large visual target |
Adding action without much width |
Many experienced tuna crews carry both because they complement each other.
A spreader bar can attract tuna to the general area, while a daisy chain or single lure may provide an alternate target.
Click Here to See Our Spreader Bar Selection
10. How to Find Tuna When Trolling Spreader Bars
Even the best spreader bar cannot catch tuna if there are no fish in the area.
Successful tuna trolling begins with locating productive water.
Temperature breaks
Tuna frequently concentrate around temperature changes that influence bait distribution.
A temperature break can create a productive feeding area, particularly when associated with current edges, floating debris, or visible bait.
The ideal water temperature varies by tuna species, season, and region, so there is no universal temperature that guarantees fish.
Chlorophyll edges and clean water
Satellite chlorophyll imagery can help identify boundaries between different water masses.
These boundaries may concentrate plankton, baitfish, and predators.
Rather than focusing solely on the warmest or clearest water, look for areas where currents and water masses interact.
Birds and surface activity
Birds are among the most valuable visual indicators of tuna activity.
Diving terns, shearwaters, gulls, and other seabirds may reveal bait being driven toward the surface.
When approaching feeding birds, avoid running directly through the school.
Instead, position the boat so your spread passes near the feeding activity without scattering the bait.
Floating debris and weed lines
Floating objects can attract baitfish and create feeding opportunities for tuna.
Weed lines, floating timber, and other debris may be worth investigating, particularly when associated with current edges.
Watch for floating material that could foul spreader bars or become tangled in the teasers.
Subsurface structure
Canyons, seamounts, ledges, and underwater humps can influence currents and concentrate bait.
In the Mid-Atlantic, offshore canyon systems are well-known areas for tuna fishing, although productive locations change with season and conditions.
Click Here to See Our Spreader Bar Selection
11. How to Get More Tuna Strikes on Spreader Bars
When tuna are present but not biting, small changes can make a significant difference.
Change your trolling speed
If tuna are following but not striking, experiment with modest speed adjustments.
Sometimes a slight increase in speed makes the stinger appear to escape, triggering a reaction strike.
In other situations, slowing down allows the squid to produce a more natural presentation.
Adjust the stinger distance
A trailing stinger that is too close to the teasers may not stand out.
Moving it slightly farther behind the school can make it appear vulnerable.
However, excessive distance can reduce the connection between the teaser school and hooked lure.
Change the bar's position
A bar that is ineffective in a long outrigger position may produce strikes when moved closer to the wake.
The opposite can also be true.
Experiment with different positions while keeping the spread organized.
Downsize the presentation
If tuna are feeding on small bait, try smaller squid or a more compact spreader bar.
Matching the size of the local forage can be especially important when fish are selective.
Add variety
If every bar in your spread looks identical, you have fewer opportunities to determine what the fish prefer.
Try different colors, squid sizes, and lure positions.
Make changes systematically so you can identify which adjustment is responsible for improved results.
Click Here to See Our Spreader Bar Selection
12. What to Do When a Tuna Hits a Spreader Bar
Spreader bar strikes can be explosive, particularly when a large bluefin or yellowfin tuna attacks the stinger.
Proper drag settings and crew coordination are essential.
Before the strike
Set the drag appropriately for the line, leader, rod, reel, and intended fishing technique.
Make sure the line is routed correctly through any outrigger clips and that the rod is secured in a suitable holder.
Keep the cockpit clear and ensure everyone understands the plan for clearing other lines.
During the strike
When a tuna strikes, allow the fish to load the rod and establish a solid hookup.
Avoid an unnecessarily violent hookset with heavy trolling tackle.
Once the fish is securely hooked, the captain should maintain control of the boat while the crew begins clearing nearby lines.
Fighting the fish
Keep steady pressure on the tuna and use smooth, controlled movements.
Large tuna may make powerful initial runs followed by prolonged deep circles beneath the boat.
The captain and angler should work together to maintain an appropriate line angle.
Landing or releasing the fish
Follow applicable regulations and safe handling practices.
For retained tuna, use properly sized landing equipment and follow the crew's established procedures.
For released tuna, minimize unnecessary handling and use safe dehooking techniques whenever possible.
Large tuna can be extremely dangerous near the boat, especially when a heavy lure or hook is under tension.
Click Here to See Our Spreader Bar Selection
13. Common Tuna Spreader Bar Mistakes
Several common mistakes can reduce the effectiveness of spreader bars.
|
Mistake |
Why it hurts performance |
Solution |
|---|---|---|
|
Trolling too fast |
Bar may tumble or run erratically |
Adjust speed until the teasers run consistently |
|
Trolling too slowly |
Teasers may lack surface action |
Increase speed within the rig's intended range |
|
Oversized squid |
May poorly match local forage |
Try a smaller squid profile |
|
Stinger too close |
Can foul or blend into the teasers |
Adjust the trailing distance |
|
Stinger too far back |
May separate visually from the school |
Bring it closer |
|
Poor spread positioning |
Creates tangles and interference |
Increase line separation |
|
Dull hooks |
Reduces penetration potential |
Inspect and replace as necessary |
|
Weak terminal connections |
Can lead to tackle failure |
Use properly matched components |
|
Excessive bar drag |
Can overload equipment |
Match bar size to tackle and support system |
Click Here to See Our Spreader Bar Selection
14. Spreader Bar Maintenance and Storage
Quality tuna spreader bars can provide years of productive fishing when properly maintained.
After each trip, rinse the entire rig with fresh water to remove salt and debris.
Inspect the artificial squid for tears, damaged skirts, and loose connections.
Check the bar for bending, cracks, corrosion, or other signs of damage.
Examine all dropper lines and leaders for abrasion.
Pay particular attention to the stinger hook, which may become dull or damaged after a strike.
Allow the bar and squid to dry before placing them into storage.
Many anglers use spreader bar bags or individual compartments to keep teaser lines separated and prevent tangling.
Storing bars carefully can save considerable time when preparing for the next offshore trip.
15. Recommended Spreader Bar Setups by Tuna Species

Yellowfin Tuna
Start with 6-inch squid on a medium-sized spreader bar. Green, pink, and natural patterns are useful options. Troll around 5–7 knots and adjust for the lure's action.

Bluefin Tuna
Try 6- to 9-inch squid depending on available forage. Use strong terminal tackle and carefully controlled drag settings. A 4.5–6.5-knot starting range can work for conventional bars.

Bigeye Tuna
Use a substantial surface presentation when fish are feeding near the top. Medium to large squid bars can be effective, especially around productive temperature breaks and low-light feeding periods.

Albacore Tuna
Smaller, lighter spreader bars can be effective when albacore are feeding on compact bait schools. Start with 4- to 6-inch teasers and experiment with trolling speed.
These setups are starting points rather than rigid formulas. Tuna behavior, bait size, water conditions, and regional fishing practices should guide your final choices.
Click Here to See Our Spreader Bar Selection
16. Tuna Fishing Regulations and Conservation
Tuna regulations vary by species, fishing location, permit type, and season.
In United States Atlantic waters, bluefin tuna and other Atlantic highly migratory species are subject to federal management requirements, which may include permits, size limits, retention limits, reporting, and seasonal restrictions.
Regulations can change during the season, particularly for Atlantic bluefin tuna.
Before leaving the dock, verify current requirements through NOAA Fisheries and the appropriate state or regional fisheries agency.
When releasing tuna, minimize handling and avoid unnecessary injury. Use appropriate tackle to reduce excessively prolonged fights and follow established release procedures.
Click Here to See Our Spreader Bar Selection
17. Final Tips for Successful Tuna Spreader Bar Trolling
Successful spreader bar fishing comes down to presentation, location, and attention to detail.
A few important principles can help improve your results:
-
Match the hatch: Select squid sizes and colors that resemble the local forage.
-
Watch the lure action: A spreader bar should run naturally, not tumble or drag beneath the surface.
-
Experiment with position: Long outriggers, short outriggers, and properly managed flat lines all have their place.
-
Keep the stinger exposed: The hooked bait should be easy for tuna to isolate from the teaser school.
-
Maintain your tackle: Inspect hooks, leaders, crimps, and teaser connections regularly.
-
Follow the fish: Concentrate on bait, birds, temperature breaks, and productive offshore structure.
-
Track what works: Record successful colors, speeds, positions, and conditions to improve future trips.
Conclusion: Why Spreader Bars Belong in Every Tuna Trolling Spread
Spreader bars have earned their place among the most productive tools in offshore tuna fishing.
By imitating a school of squid or baitfish, they create a large, highly visible presentation that can attract tuna and trigger aggressive strikes.
Their versatility makes them useful for targeting yellowfin, bluefin, bigeye, and albacore tuna across a wide range of offshore conditions.
The key to success is selecting the right bar, matching the artificial squid to the available forage, positioning the rig correctly, and maintaining a trolling speed that produces realistic action.
Whether you're fishing the offshore canyons of the Mid-Atlantic, targeting bluefin off New England, or searching for yellowfin in warm Gulf Stream waters, a properly rigged spreader bar can be one of the most valuable additions to your trolling spread.
When the tuna are feeding, few sights are more exciting than watching a big fish explode on a spreader bar behind the boat.